Assembling your own system offers unmatched customization and value, but success starts with knowing the core parts required. Modern PC construction is more accessible than ever, with projects taking 1–4 hours depending on experience. Budgets range from $300 for basic setups to $3,000+ for professional-grade machines, making it crucial to align component choices with your goals.
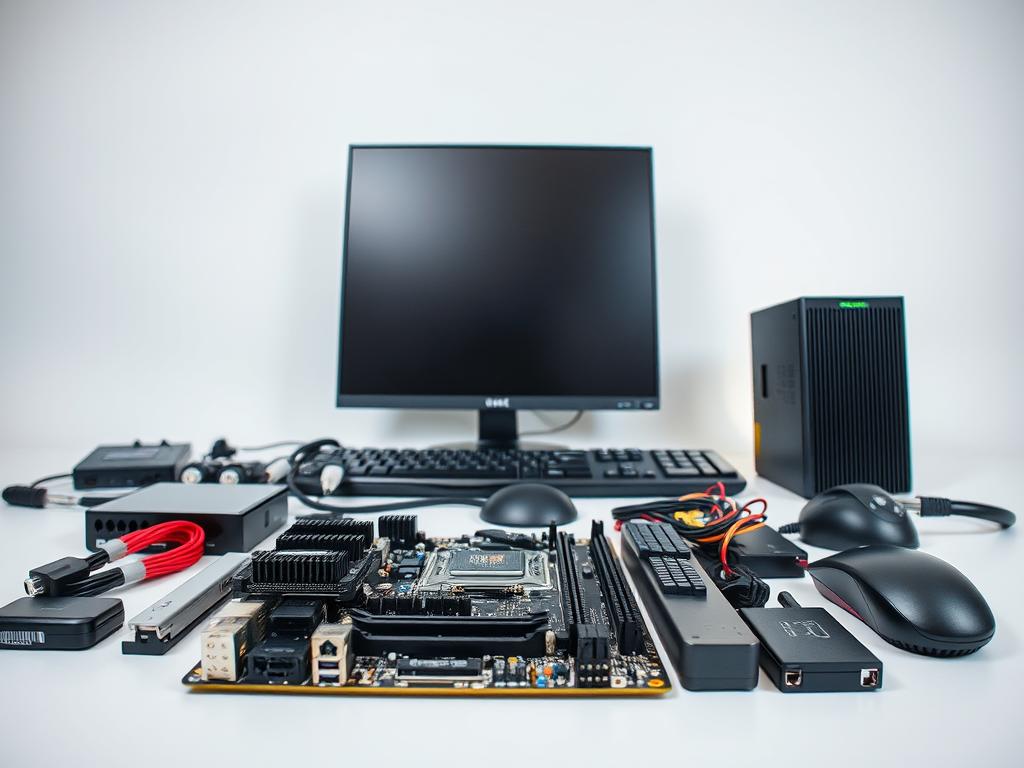
Every functional machine relies on seven essential elements: a motherboard, processor, memory, storage, power supply, case, and cooling system. These pieces form the foundation, while add-ons like dedicated graphics cards or advanced cooling solutions elevate performance for gaming or creative work. Compatibility between parts ensures smooth assembly and operation.
Cost efficiency doesn’t mean sacrificing quality. Entry-level builds handle everyday tasks effortlessly, while mid-range configurations ($700–$1,200) balance gaming and productivity. High-end systems prioritize cutting-edge technology for 4K rendering or multitasking-heavy workflows. Researching benchmarks and user reviews helps identify components that deliver optimal results within your price range.
Key Takeaways
- Typical assembly time ranges from 1 hour (experienced) to 4 hours (beginners)
- Budget tiers span $300–$600 (basic), $700–$1,200 (mid-tier), and $1,500+ (high-performance)
- Seven core components form every system’s foundation
- Usage goals dictate specialized parts like GPUs or liquid cooling
- Compatibility checks prevent installation issues
Introduction
Tailoring every part of your machine ensures it meets exact performance and style demands. Unlike prebuilt options, custom setups let you prioritize components that match specific tasks—whether handling complex workflows or delivering smooth gaming experiences. This approach often costs 15–30% less than retail equivalents in mid-tier configurations.
Choosing individual parts improves quality control and allows strategic upgrades. A self-assembled system evolves with technology trends—swap GPUs for better rendering or add RAM for multitasking. Hands-on assembly builds practical skills, from cable management to thermal paste application.
Troubleshooting becomes intuitive when you understand each component’s role. Custom builds eliminate bloatware common in store-bought computers, boosting efficiency. Enthusiasts report 40% longer hardware lifespans when selecting premium materials during initial construction.
| Tier | Prebuilt Cost | Custom Cost |
|---|---|---|
| Entry-Level | $500–$700 | $300–$450 |
| Mid-Range | $1,000–$1,500 | $700–$1,100 |
| High-End | $2,500+ | $1,800–$2,200 |
Gaming rigs benefit most from personalized configurations. Allocating more budget to graphics cards while optimizing cooling solutions prevents throttling during marathon sessions. Every self-built system becomes a learning tool, demystifying how modern computers operate at their core.
Understanding Your PC Needs and Goals
Every successful PC project begins by mapping components to real-world applications. Whether tackling complex simulations or streaming media, your daily tasks dictate which parts deliver optimal value. Clear objectives prevent overspending on unnecessary features while ensuring critical performance thresholds are met.
Related Posts:


Identifying Your Usage Scenarios
Gaming setups prioritize graphics cards capable of handling 1440p resolutions at high refresh rates. Content creation rigs demand multi-core processors and NVMe storage for 4K video editing. Students and office users benefit most from reliable mid-range CPUs that handle multitasking without thermal throttling.
Professional workloads like 3D rendering require workstation GPUs with certified drivers. Casual users can save costs by opting for integrated graphics and smaller power supplies. Matching hardware to actual needs ensures efficient resource allocation across all build tiers.
Setting a Realistic Budget
Entry-level systems targeting basic tasks often stay under $500 by focusing on value-oriented parts. Mid-range gaming builds allocate 40% of funds to GPUs while maintaining balanced cooling solutions. High-end configurations invest in future-proofing through PCIe 4.0 storage and modular power supplies.
Allocate 20–30% of your budget for upgradable components like cases and motherboards. Seasonal sales and last-gen hardware help stretch dollars further without compromising core needs. Always reserve 10% for peripherals and thermal management accessories.
What Hardware Do You Need to Build a Personal Computer
Constructing a custom PC requires eight core components working in harmony. The motherboard acts as the foundation, linking every part through its intricate circuitry. This critical board determines which processors and memory modules fit, making future upgrades dependent on its design specifications.
Processing power stems from the CPU, which executes billions of calculations per second. Modern chips handle everything from basic web browsing to 3D rendering. Paired with RAM modules, these parts determine how smoothly applications run during intensive multitasking sessions.
Storage drives store your operating system and files. Solid-state drives outperform traditional hard disks with near-instant data access. Graphics capabilities come either integrated into the CPU or through dedicated cards for gaming and design work.
The power supply converts AC current into stable DC voltage for all components. Choosing one with adequate wattage prevents system crashes. Finally, the case houses everything securely while managing airflow to prevent overheating.
Every motherboard dictates expansion limits through its PCIe slots and RAM capacity. Balancing these parts ensures seamless compatibility and room for later enhancements. Proper planning turns individual pieces into a cohesive, high-performance machine.
Essential Components Overview
Creating a high-performance system begins with strategic component selection. Compatibility checks prevent mismatches between your motherboard’s specifications and other parts. Overlooking socket types or physical dimensions leads to installation headaches and wasted budgets.

Modern motherboards dictate three critical factors: CPU socket design, RAM generation support, and expansion slot availability. A processor designed for AM5 sockets won’t fit Intel’s LGA 1700 platforms. Similarly, DDR5 memory modules require compatible motherboard slots to function.
Power demands vary wildly across components. High-end GPUs alone can consume 350W under load. Pairing such hardware with an undersized PSU risks shutdowns or component damage. Always calculate total wattage needs before selecting a power supply.
Form factors determine physical fit and cooling potential. Compact ITX cases limit GPU lengths and radiator sizes. Full-tower designs offer superior airflow but demand more space. Match case dimensions to your motherboard size and cooling preferences.
Prioritize reliability in foundational parts like PSUs and storage drives. Cutting corners here risks data loss or sudden failures. Balance initial costs against long-term performance by researching warranty terms and failure rates.
Every system thrives when components complement each other. Pairing a flagship processor with slow storage creates frustrating bottlenecks. Analyze benchmarks to ensure balanced performance across all hardware tiers.
PC Case Options and Aesthetic Considerations
Your system’s visual identity begins with the case, which shapes both appearance and thermal performance. Five standardized sizes dictate compatibility with motherboards and cooling solutions. Matching these dimensions ensures components fit securely while maintaining airflow efficiency.

Case Sizes and Motherboard Compatibility
Mid-tower designs dominate the market, supporting ATX motherboards and multiple storage bays. Full-tower variants accommodate E-ATX boards for workstation builds, offering 12+ expansion slots. Compact small form factor cases require mini-ITX motherboards and low-profile cooling systems.
Space constraints influence component choices. Larger cases simplify cable routing and support 360mm radiators. Smaller builds prioritize portability but limit GPU lengths. Always verify maximum cooler heights and PSU dimensions before purchasing.
Airflow and Styling Features
Mesh-front panels reduce internal temperatures by 15–20% compared to solid designs. Strategic fan placements create positive air pressure, minimizing dust buildup. RGB lighting strips and tempered glass windows transform functional builds into display pieces without affecting thermal performance.
Modern cases include tool-free drive bays and modular panels for easy upgrades. Built-in cable channels keep wires hidden, improving airflow paths. Choose neutral colors like black or white for timeless appeal, or bold hues to match themed setups.
Selecting the Right Motherboard
The backbone of every custom build lies in its motherboard—the central hub connecting all core components. This critical board determines which CPU models fit, what memory speeds unlock, and how storage devices interface. Choosing wisely ensures seamless integration across your entire system.
Socket compatibility is non-negotiable. Intel and AMD processors demand distinct physical layouts—a Ryzen chip won’t seat in an LGA 1700 socket. Memory support dictates whether DDR4 or DDR5 modules operate at full speed, with most modern motherboards handling 64–128GB RAM across four slots.
Expansion potential shapes future upgrades. PCIe x16 slots accommodate graphics cards, while M.2 interfaces enable NVMe storage speeds. Premium motherboards include Wi-Fi 6E and Thunderbolt 4 ports, eliminating the need for extra adapters.
Chipset capabilities define performance limits. Enthusiast-grade boards like Z790 or X670 allow CPU overclocking and multi-GPU setups. Entry-level options often lack PCIe 5.0 lanes crucial for next-gen components. Prioritize models with robust VRM cooling and Japanese capacitors for stability during heavy workloads.
Balance cutting-edge features with practical needs. A motherboard supporting PCIe 5.0 and USB4 ensures readiness for upcoming tech without overspending. Always verify compatibility lists and warranty terms—your system’s reliability starts here.
Choosing a Processor (CPU) and Cooling System

Modern computing power hinges on selecting the right processing unit. Clock speeds measured in gigahertz (GHz) indicate how many cycles a CPU completes per second, with most current models operating between 3.5–5.8 GHz. However, raw speed tells only part of the story. “Core count and architectural efficiency determine real-world responsiveness more than peak GHz alone,” notes PC hardware analyst Mark Torres.
Balancing Speed and Core Efficiency
High-core-count processors excel at multitasking and content creation. A 12-core chip handles video editing while streaming better than a 4-core model, even at identical clock speeds. Base your choice on workload demands—gaming benefits from faster single-core performance, while 3D rendering thrives with multiple threads.
Thermal Management Solutions
Air coolers dominate budget builds with simple installation and zero maintenance. Premium models like Noctua’s NH-D15 rival liquid systems at lower costs. Closed-loop liquid coolers reduce temperatures by 10–15°C under load, ideal for overclocked CPUs.
| Cooling Type | Noise Level | Max TDP Support |
|---|---|---|
| Air | Moderate | 250W |
| 240mm Liquid | Quiet | 350W |
Always verify socket compatibility between your processor and cooler. Intel’s LGA 1700 and AMD’s AM5 platforms require specific mounting hardware. Proper thermal paste application ensures optimal heat transfer, preventing throttling during extended use.
Memory (RAM) Options and SSD Storage Considerations

System performance hinges on two critical elements: memory for instant data access and storage for long-term file retention. Modern configurations demand careful planning to balance speed, capacity, and budget.
RAM Compatibility Checks
Motherboard specifications dictate three key memory requirements. DDR4 and DDR5 modules aren’t interchangeable—match your board’s supported generation. Clock speeds above 3200MHz often require enabling XMP profiles in BIOS for stable operation.
Dual-channel setups double bandwidth by using two identical sticks. For example, 16GB RAM performs better as 2x8GB than a single 16GB module. Most gaming rigs now standardize on 32GB configurations to handle demanding titles and background tasks.
SSD vs HDD Benefits
Solid-state drives revolutionize storage with near-instant data retrieval. NVMe models deliver sequential read speeds exceeding 7,000 MB/s—six times faster than SATA SSDs. Unlike mechanical hard drives, SSDs have no moving parts, reducing failure risks during transport.
| Feature | SSD | HDD |
|---|---|---|
| Boot Time | 8–12 seconds | 30–40 seconds |
| Durability | 2M hours MTBF | 600K hours MTBF |
| Noise | Silent | Audible clicks |
Cost-per-gigabyte favors HDDs for bulk storage, but NVMe drives dominate primary installations. Most motherboards now include dedicated M.2 slots for streamlined SSD mounting without cables.
Graphics Processing Unit (GPU): Integrated vs Dedicated Solutions
Visual performance dictates user experience across modern computing tasks. The graphics processing unit accelerates image rendering, video playback, and complex calculations faster than CPUs alone. Integrated solutions built into processors handle everyday needs like web browsing and document editing efficiently.
Dedicated GPUs unlock transformative power for gaming and professional workflows. These standalone cards contain thousands of cores optimized for parallel processing. High-end models deliver 4K gaming at 120+ FPS or render 3D scenes in minutes instead of hours.
Memory bandwidth and capacity determine how graphics hardware handles resolutions and textures. Entry-level cards with 8GB VRAM suit 1080p gaming, while 24GB models dominate 8K video editing. Always verify physical dimensions—some triple-slot designs won’t fit compact cases.
Power requirements vary dramatically between solutions. Integrated graphics draw under 15W, while flagship GPUs demand 450W. Match your power supply’s capacity and connectors to prevent instability. Mid-range options like RTX 4070 balance performance and efficiency for most users.
Future-proofing involves anticipating software demands. “Invest in graphics processing units that exceed current needs by 20–30%,” advises PC hardware specialist Laura Chen. This buffer accommodates evolving game engines and creative software updates without immediate upgrades.
Power Supply Unit (PSU) Selection and Cable Management
A reliable power supply transforms component performance from unstable to seamless. Start by calculating total system wattage using online tools, then add 20% headroom for stability. ATX-standard PSUs ensure compatibility with most motherboards while offering efficient energy distribution.
Efficiency ratings matter—80 Plus Bronze units convert 82% of energy, while Platinum models reach 94%. Modular designs let users connect only necessary cables, reducing clutter and improving airflow. This streamlined approach prevents heat buildup in compact builds.
Quality construction prevents catastrophic failures. Look for Japanese capacitors and over-voltage protection in your power supply. Avoid skimping here—a faulty unit can damage high-value components like GPUs or processors. Proper cable management extends hardware lifespan while maintaining clean aesthetics.
Match wattage to peak demands, including GPU spikes during gaming sessions. Trusted brands offer precise compatibility charts and warranty coverage. Your PSU isn’t just a component—it’s the system’s electrical backbone.